
| Address: | PDS Enterprise Inc. 1650 West Artesia Blvd, Suite 278 Gardena, CA90248 |
| Phone: | 1-843-408-0142 |
| Email: | pdsenterprise@gmail.com sales@coolprototyping.com |


Home>Popular Page
149. How to Make a Surprisingly Durable Hump Mold out of Unfired Clay
Begin by making a clay mold that will be used to drape a slab over. The mold will be used to make the bottom quarter of the final bowl form that will then be built up to the finished shape and height with coils. I begin the mold with a large thick slab, cut around the drawn line then add and remove clay as needed to create the desired form. Take your time in shaping the custom molds; even out and smooth the surface with a rasp, then refine the shape and the surface with metal and rubber ribs.
1. Using a paper pattern, trace the outline of the top of the mold.
2. Put clay onto the mold, taking care to remain inside your outline.
3. Smooth the surface, and then level the bottom of the mold.
Once the mold has set up to firm leather hard turn it upright and examine it. Check the shape to assure that the shape is what you're looking for and add or remove clay as needed. For a longer lasting mold, you may want to make a plaster one; although I have been using some of the same bone-dry clay custom molds for a couple of years.
4. Hollow out the leather-hard mold, leaving some thick walls.
5. Drape a soft slab over the mold, completely covering it.
6. Fit the slab to the mold, and then trim excess clay with an X-Actor knife.
Because of the setting up time needed in coil building, I work on many pieces at once, putting another slab on the mold right after I take one off. I can build this form in one day, but time varies depending on the size and complexity.
7. Bevel the interior edge to prepare it for an added coil.
8. Add a large, slightly flattened coil to the rim and blend the interior seam.
9. Add a thin coil to outside wall where the larger coil and the pot meet.
Roll out a large coil the length of the circumference of the pot's rim. I use a thread to measure the rim and coil. Slightly flatten the coil with your hand and bevel the edge that attaches to the interior beveled edge of the pot with your hand or small rolling pin.
10. Remove clay down to your marks and create a gradual curve to the rim.
11. Smooth out and finish the curve and soften the rim.
Once you have the desired height and volume, even out the rim, then measure and mark the four corners of the rim using a string and ruler. Decide how much of a curve you would like and mark the lowest point on two opposite sides of the rim.

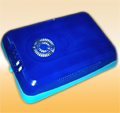
Product design
samples
rapid prototyping
samples
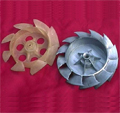
Custom molds
samples

Electronic product
design samples
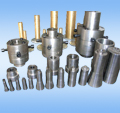
rapid prototype
samples
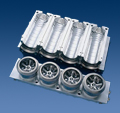
Plastic molds
samples
 We are constantly looking for new products in order to grow our business and Invention Home has enabled us to streamline that process much more quickly.
 Marsha Dunmyre
CA, U.S.A
Cool Prototyping Copyright 2008-2009 © All Rights Reserved. Rapid Prototyping