
| Address: | PDS Enterprise Inc. 1650 West Artesia Blvd, Suite 278 Gardena, CA90248 |
| Phone: | 1-843-408-0142 |
| Email: | pdsenterprise@gmail.com sales@coolprototyping.com |


Home>Glossary
229. Rapid Prototyping Process
Rapid prototyping is the automatic construction of physical objects using additive manufacturing technology. To learn more about rapid prototyping, herunder I elaborate a 5 steps process to create a rapid prototyping model.
1.A 3D Computer aided model (CAD) of the initial idea or concept sketch design will be created.
2.This 3D CAD model will be converted in a STL or IGES format.
3.The STL model will be sliced into thin cross-sectional layers.
4.The model will be constructed one later atop another.
5.The model will be finished and cleaned: your rapid prototype is ready!
CAD Model Creation: First, the object to be built is modeled using a Computer-Aided Design (CAD) software package.
Solid modelers, such as Pro/ENGNEER, tend to represent 3-D objects more accurately than wire-frame modelers such as AutoCAD, and will therefore yield better results. The designer can use a pre-existing CAD file or may wish to create one expressly for prototyping purposes. This process is identical for all of the RP build techniques.
Conversion to STL Format: The various CAD packages use a number of different algorithms to represent solid objects. To establish consistency, the STL (stereolithography, the first RP technique) format has been adopted as the standard of the rapid prototyping industry. The second step, therefore, is to convert the CAD file into STL format. This format represents a three-dimensional surface as an assembly of planar triangles, "like the facets of a cut jewel." 6 The file contains the coordinates of the vertices and the direction of the outward normal of each triangle.
Because STL files use planar elements, they cannot represent curved surfaces exactly. Increasing the number of triangles improves the approximation, but at the cost of bigger file size. Large, complicated files require more time to pre-process and build, so the designer must balance accuracy with manageablility to produce a useful STL file. Since the .stl format is universal, this process is identical for all of the RP build techniques.
Slice the STL File: In the third step, a pre-processing program prepares the STL file to be built. Several programs are available, and most allow the user to adjust the size, location and orientation of the model. Build orientation is important for several reasons. First, properties of rapid prototypes vary from one coordinate direction to another. For example, prototypes are usually weaker and less accurate in the z (vertical) direction than in the x-y plane. In addition, part orientation partially determines the amount of time required to build the model. Placing the shortest dimension in the z direction reduces the number of layers, thereby shortening build time. The pre-processing software slices the STL model into a number of layers from 0.01 mm to 0.7 mm thick, depending on the build technique. The program may also generate an auxiliary structure to support the model during the build. Supports are useful for delicate features such as overhangs, internal cavities, and thin-walled sections. Each PR machine manufacturer supplies their own proprietary pre-processing software.
Layer by Layer Construction: The fourth step is the actual construction of the part. Using one of several techniques (described in the next section) RP machines build one layer at a time from polymers, paper, or powdered metal. Most machines are fairly autonomous, needing little human intervention.
Clean and Finish: The final step is post-processing. This involves removing the prototype from the machine and detaching any supports. Some photosensitive materials need to be fully cured before use. Prototypes may also require minor cleaning and surface treatment. Sanding, sealing, and/or painting the model will improve its appearance and durability.

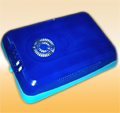
Product design
samples
rapid prototyping
samples
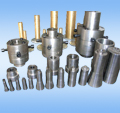
Custom molds
samples
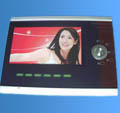
Electronic product
design samples
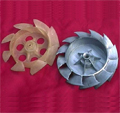
rapid prototype
samples
Plastic molds
samples
 We are constantly looking for new products in order to grow our business and Invention Home has enabled us to streamline that process much more quickly.
 Marsha Dunmyre
CA, U.S.A
Cool Prototyping Copyright 2008-2009 © All Rights Reserved. Rapid Prototyping